


AWS Best Practice: Azure AD SAML Authentication Configuration for AWS Console
- October 11, 2017
As AWS experts, we often get asked how different technologies can work with AWS. Most recently we had a customer ask us how to use Azure Active Directory (AD) to manage user authentication to access the AWS console. While we don’t often discuss hybrid cloud technologies, we thought we’d share with you how we configured Azure AD to manage access to the AWS console.
By following the steps we outline here, you will get:
Two AWS accounts with 3 identical roles in each (Admin, Dev, Auditor)
Three Azure AD groups (Admin, Dev, Auditor) which will map to AWS IAM roles
One Azure AD Enterprise application to control all users and groups
Before we dive in, note that while Microsoft offers a tutorial on how to integrate Azure AD with AWS, our guide differs as it does not require storing AWS root account credentials in Azure.
To get started you will need:
Two AWS accounts
One Azure account
Step One: Create users and groups in Azure AD
In the Azure portal, go to Azure AD → Users and Groups → All Groups
Click on New Group and create the following groups:
| Name | Description | Membership Type |
| AWS Admins | AWS Administrators | Assigned |
| AWS Devs | AWS Developers | Assigned |
| AWS Auditors | AWS Auditors | Assigned |
Click on All Users → New Users and create the following users:
| Name | User Name | Group |
| Admin User | admin@flux7demo.onmicrosoft.com | AWS Admins |
| Dev User | dev@flux7demo.onmicrosoft.com | AWS Devs |
| AWS Auditor | auditor@flux7demo.onmicrosoft.com | AWS Auditors |
Step Two: Setup Enterprise Application in Azure AD
Click on Azure AD → Enterprise applications → All applications → New Application → All
In the text box enter “AWS” and you should see 2 applications
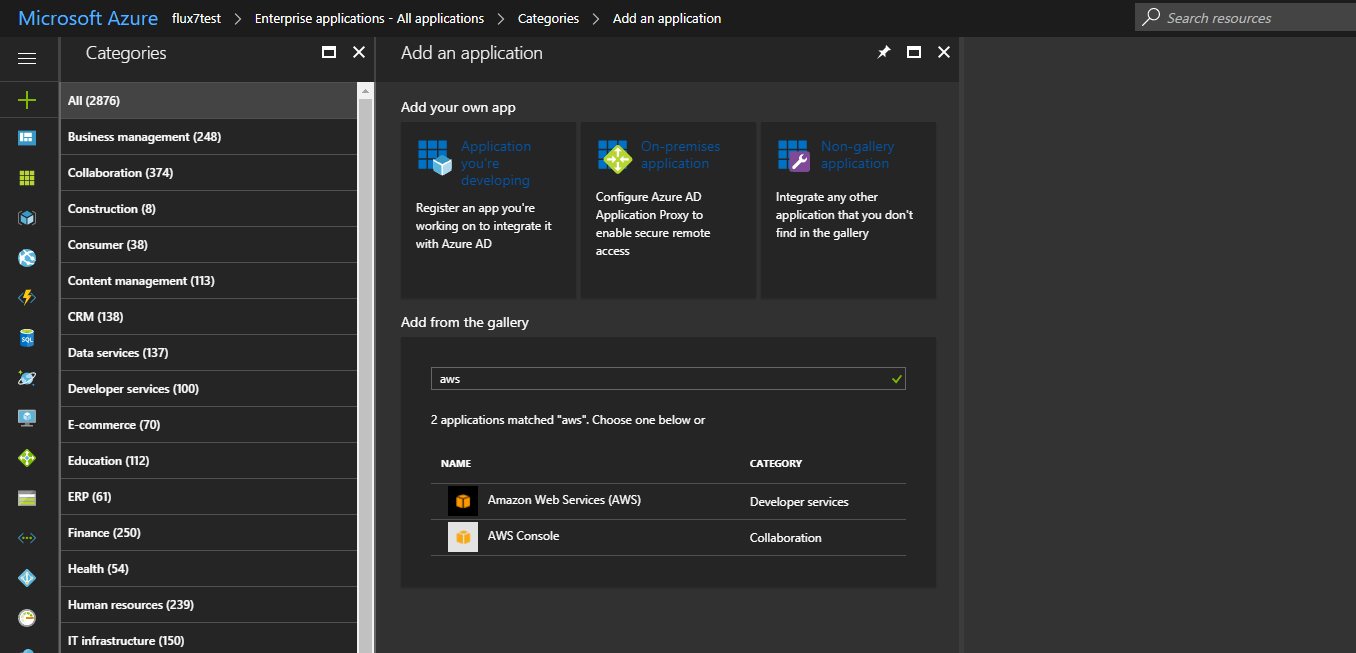
Select the one with the black icon “Amazon Web Services (AWS) – Developer services”
Change the name as needed, as it will display to end users, then click Add
Click on Single sign-on and select SAML-based Sign-on
Check the checkbox View and edit all other user attributes
Click on Add attribute and add the following
| Name | Value |
| https://aws.amazon.com/SAML/Attributes/RoleSessionName | user.userprincipalname |
| https://aws.amazon.com/SAML/Attributes/Role | user.assignedroles |
Note: you can leave the namespace empty; if you refresh the page it will update it automatically.
Also note that instead of user.assignedroles, you can set https://aws.amazon.com/SAML/Attributes/Role with the <IAM role ARN>,<IAM Identity Provider ARN> if you have a single role and account.
- Download the metadata XML
- Click on Save
Step Three: Setup Identity Provider in AWS IAM
Repeat the following tasks twice, once on each AWS account.
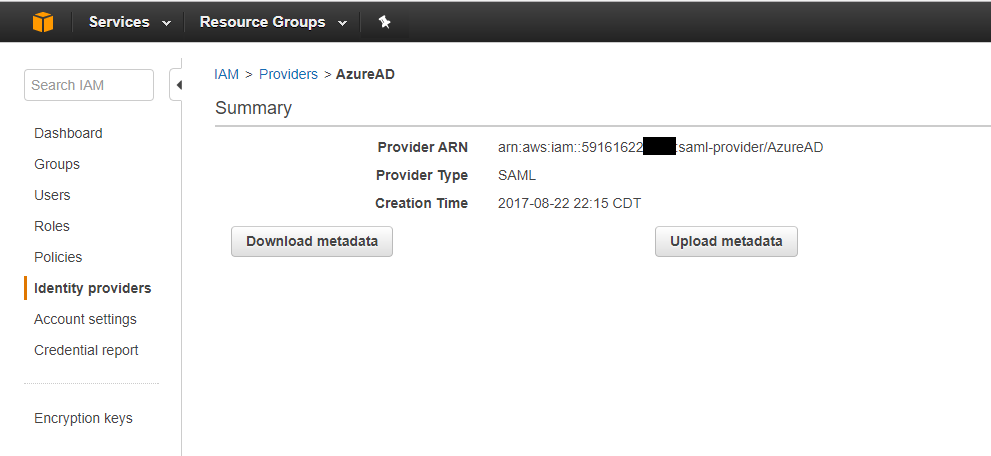
- Login to the AWS Console and click on IAM → Identity Providers → Create Providers
- Select SAML as Provider Type
- Enter AzureAD as Provider Name
- Upload the Metadata XML file downloaded previously
- Click on Next → Create
Step Four: Setup IAM Roles
- Click on Roles → Create new role → Grant Web Single Sign-On (WebSSO) access to SAML provider
- Select AzureAD as SAML Provider
- Click on Next Step
- Select AdministratorAccess as policy
- Enter AWS-Admins-SAML-AzureAD as Role name
| Role Name | Policy |
| AWS-Admins-SAML-AzureAD | AdministratorAccess |
| AWS-Devs-SAML-AzureAD | AmazonS3FullAccess |
| AWS-Auditors-SAML-AzureAD | AWSConfigRole AWSCloudTrailReadOnlyAccess |
- Take note of the Role ARN and Trusted Identity for each role
| Role | Account | Role ARN | Trusted Identifty |
| AWS-Admins-SAML-AzureAD | 591616221111 | arn:aws:iam::591616221111:role/AWS-Admins-SAML-AzureAD | arn:aws:iam::591616221111:saml-provider/AzureAD |
| AWS-Devs-SAML-AzureAD | 591616221111 | arn:aws:iam::591616221111:role/AWS-Devs-SAML-AzureAD | arn:aws:iam::591616221111:saml-provider/AzureAD |
| AWS-Auditors-SAML-AzureAD | 591616221111 | arn:aws:iam::591616221111:role/AWS-Auditors-SAML-AzureAD | arn:aws:iam::591616221111:saml-provider/AzureAD |
| AWS-Admins-SAML-AzureAD | 698203112222 | arn:aws:iam::698203112222:role/AWS-Admins-SAML-AzureAD | arn:aws:iam::698203112222:saml-provider/AzureAD |
| AWS-Devs-SAML-AzureAD | 698203112222 | arn:aws:iam::698203112222:role/AWS-Devs-SAML-AzureAD | arn:aws:iam::698203112222:saml-provider/AzureAD |
| AWS-Devs-SAML-AzureAD | 698203112222 | arn:aws:iam::698203112222:role/AWS-Auditors-SAML-AzureAD | arn:aws:iam::698203112222:saml-provider/AzureAD |
Step Five: Configure App Registrations in Azure AD
- Click on Azure AD → App Registrations
- Select the application created. By default it is Amazon Web Service (AWS).
- Click the edit Manifest icon
- Edit the manifest by adding the following code to the appRoles array
You will need to change the manifest example above to match your account numbers.
| Attribute | Comment |
| displayName | Name of the role to assign in Azure AD in the next section of this guide |
| id | Must be unique |
| description | Name of the role displayed to the users when logging in |
| value | <role arn>,<identity provider arn> |
Step Six: Assign roles to groups
- Click on Azure AD → Enterprise applications → All applications
- Select your application
- Click on Users and Groups → Add user
- Click on Users and groups
- Select the group AWS Admins, click Select
- Click on Select Role
- Select AWS Administrators 591616221111, click Select, click Assign
Repeat the steps above for the following groups and roles.
| Azure AD Group | Role assigned |
| AWS Admins | AWS Administrators 591616221111 |
| AWS Admins | AWS Administrators 698203112222 |
| AWS Devs | AWS Developers 591616221111 |
| AWS Devs | AWS Developers 698203112222 |
| AWS Auditors | AWS Auditors 591616221111 |
| AWS Auditors | AWS Auditors 698203112222 |
Step Seven: Test the solution
Testing as an admin user
- Go to myapps.microsoft.com in a private tab/incognito mode
- Login as admin@flux7demo.onmicrosoft.com
- You may be asked to reset the user password
- Click on the Amazon Serb Services (AWS) icon
- Select a role
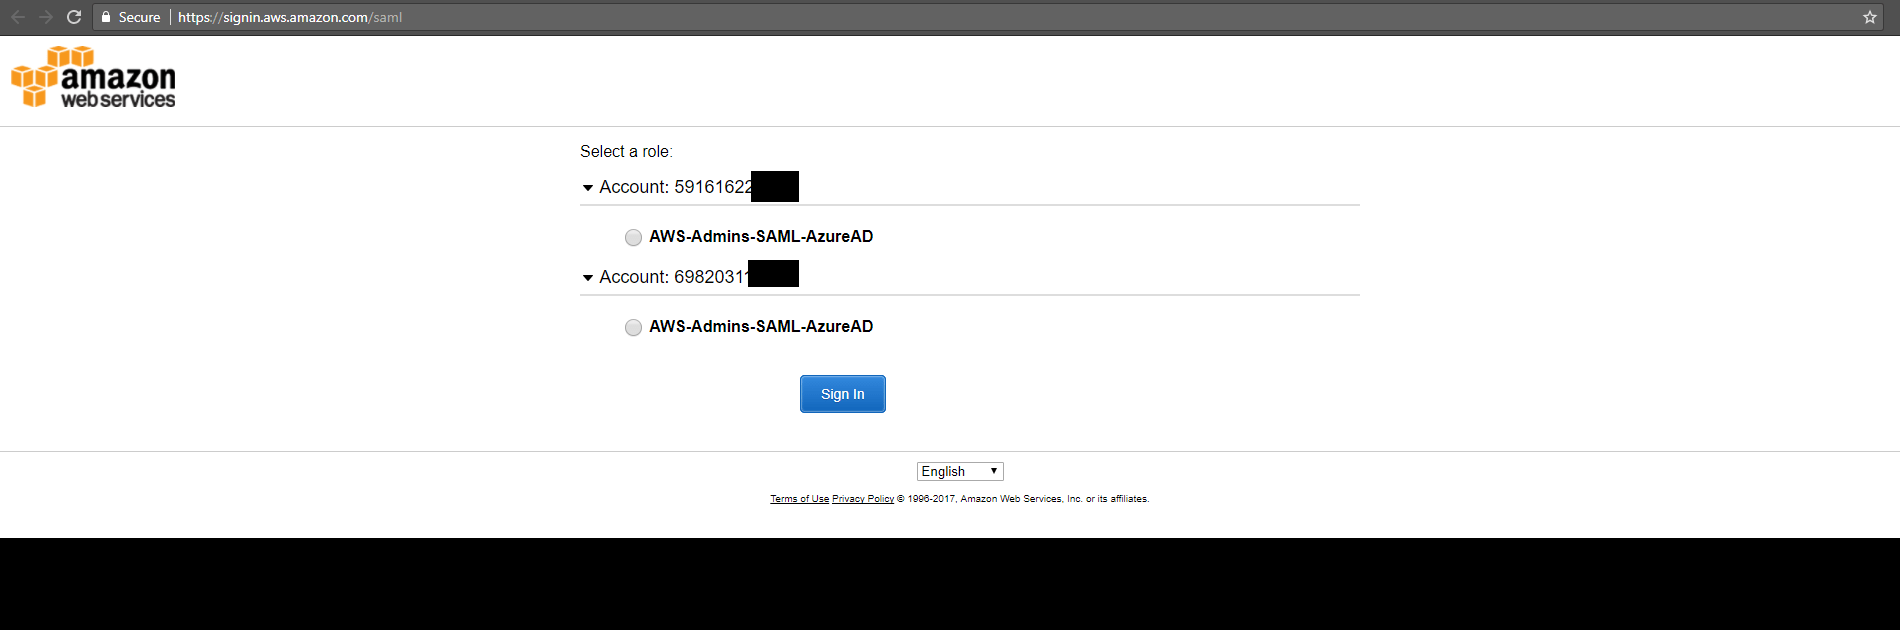
- Verify you are logged on in the right account with the right role
Testing as a dev user
- Log out and log back in with dev@flux7demo.onmicrosoft.com, click on the AWS icon
- Select a role
- You can hover over your identity at the top right to see the full information about your current identity
Testing as an auditor user
- Log out and log back in with auditor@flux7demo.onmicrosoft.com, click on the AWS icon
- Select a role
- Verify you are logged on in the right account with the right role
Following these seven simple steps, you can now successfully use Azure AD to manage user authentication to access the AWS console. Not only will you be able to control in Azure AD who has access to AWS, you will be able to use Single Sign On for AWS via Azure AD. Last, if you are already using Azure AD as your central account repository, these steps will help you manage all your accounts in one location.
Last, it’s important to note that the AWS Console requires the SAML Entity ID to be either https://signin.aws.amazon.com/saml or urn:amazon:webservices. And, Azure AD requires the identifier to be unique within the Azure AD organization. This means you will not be able to configure more than two enterprise apps for the AWS Console. However, by following these steps, you should be able to manage everything from a single enterprise app.
Subscribe to our blog